As technology continues to evolve and consume our daily lives, more consumers than ever before are turning to eCommerce options. Of course, one of the largest eCommerce platforms in the world is Shopify. While the Shopify platform has a lot to offer businesses, managing your Shopify store’s data alone can be quite challenging. The good news is that you don’t have to take on the complexities of data management alone.
In this two-part series, we'll cover how you can use Integrate.io to efficiently extract your Shopify store data and make informative visualizations using tools like Google Data Studio. We will try to set up a system that can be configured to answer analytical questions about your Shopify store with the help of charts and visualizations. An example of these questions include:
- How many sales have happened during the current day/week/month?
- How much has the revenue changed as compared to last month/quarter/year?
- Where are my orders coming from? How many new customers are acquired this month?
- How many orders are getting refunded?
- How many orders are unfulfilled? How many payments are in the pending state?
We will also walk you through a general process that you can follow to answer any number of these. Having a quick look at the Shopify app store reveals that the apps that create such visualizations cost hundreds of dollars annually with a fixed feature-set, so this set up might give you more flexibility at a much lower cost.
In Part One, we will configure the data source (the Shopify store) and destination. In Part Two, we will create an Integrate.io pipeline to fetch the Shopify data, and then use Google Studio to visualize the data to answer questions like above.
Read on to discover more about the process of extracting and visualizing your Shopify data and to learn how the Integrate.io platform can help you get the most of your business data.
About the Shopify Store
If you have a store already, you can connect that store with Integrate.io in the next step.
If you'd like to complete these steps using simulated data first, you can set up a development store (as we will do here), and push some real-world like data to it using Shopify's Admin API (for the code to do that, see the next step).
To set up a development store, follow these instructions from Shopify Fill in any details, and choose any store purpose in the Development store set up form.
Setting up a Shopify Connection
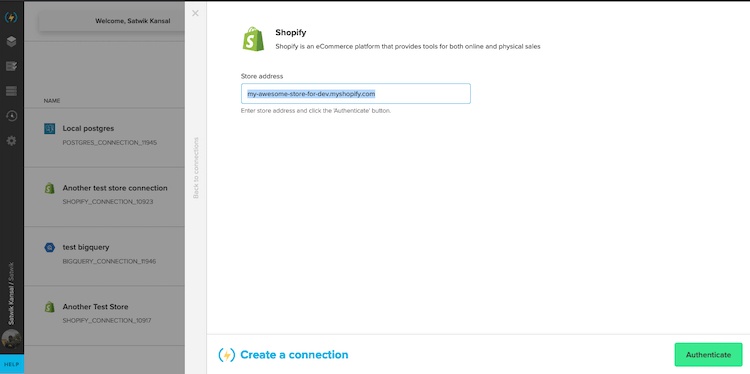
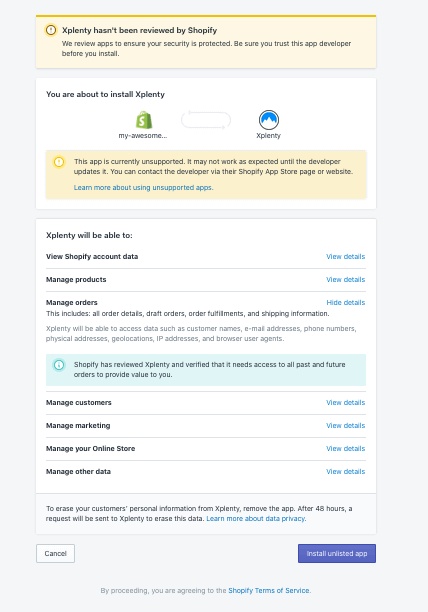
Now that you have a store ready, the next step is to connect the store with Integrate.io. You need to create a new Shopify connection from the Integrate.io dashboard by providing your Shopify store address.
If you get stuck, check the step by step instructions in our Allowing Integrate.io access to my data on Shopify article.
Populating Sample Data
You can use the following steps to populate some data into your development store. If you're trying it out on a real store (and have some orders placed already), skip to the next section.
Setting Up a Private App
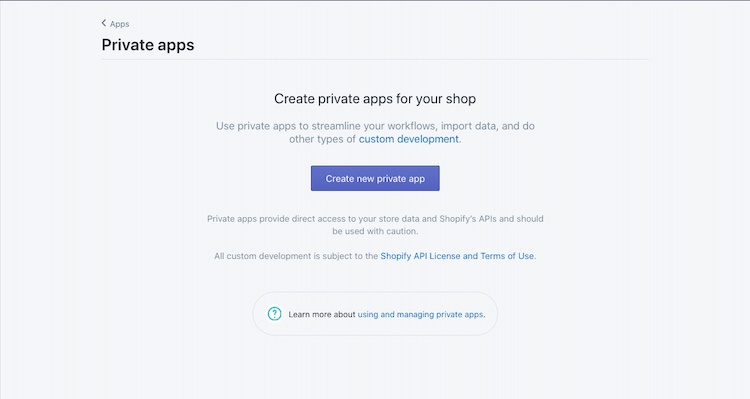
Private apps in Shopify enable you to access the APIs. You can follow these instructions to set up a Private app.
Make sure to give the following permissions to your app:
- Customers: Read and Write
- Orders: Read and Write
- Products: Read and Write
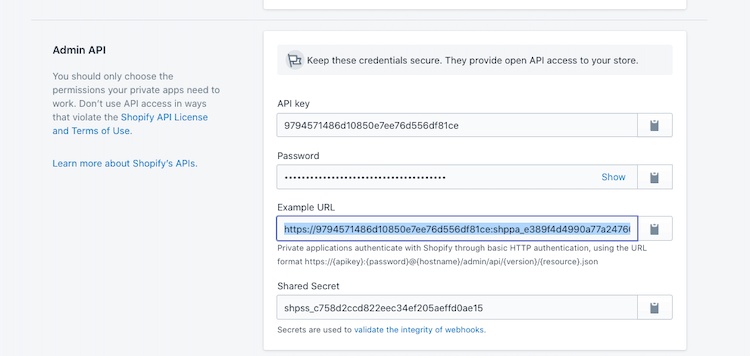
Once your app is created with the above permissions, you'll see a field called "Example URL" in the Admin API section of app settings. Copy this URL and try it out in your browser.
You should see the following output on your browser window:
{
    "orders":[]
}
This is the result of the Orders API given by Shopify in JSON format.
Understanding the URL Structure for Shopify APIs
If you observe the URL, it is of the format https://$api_key:$password@$store_url/admin/api/2020-07/orders.json, where:
- $api_key, $password, and store_url are your API key, app password, and the store URL, respectively.
- /admin/api/2020-07 says we want to access admin APIs of version 2020-07
- orders.json says we want the Orders resource data specifically in JSON format. We would use products.json for products, and for customers, we would use customers.json.
Note: If you're setting up the Private app on a live store, please don't share this URL publically.
Since we don't have any orders in our development store yet, the returned JSON array is empty. The next step is generating such data using some code,
Simulating Data for your Shopify store
You can use my Python script to generate some data to play with. The instructions to set it up are provided in the README file of the Github repository. It should take no more than 5 minutes to get it running.
Related Reading: How Do Data Pipelines Fit Into Your Data Stack?
The Shopify API Structure
Now that you have data in your Shopify store, it's time to create a pipeline in Integrate.io.
For this post, our focus will be on three major API resources of Shopify's Admin API; Customer, Product, and Orders. As mentioned before, a typical API URL for Shopify looks something like this,
https://$shop_name/admin/api/2020-07/customers.json?limit=250&updated_at_min=$last_updated
I have added a couple of URL parameters at the end:
- limit to specify the number of records to retrieve on every API call (i.e. page), and
- updated_at_min to specify the timestamp threshold to filter old records.
The Shopify APIs support cursor-based pagination and the URL of the next page is shared through the Link header in the API response. Pagination is handled automatically in Integrate.io's Shopify connection, so you won't need to worry too much about writing its logic.
An important thing to note is that the responses of these APIs contain nested maps and arrays. For example, here's a non-empty response of Products API:
{
    "products": [
        {
            "id": 5605681594534,
            "title": "ADIDAS | CLASSIC BACKPACK",
            "body_html": "This women's backpack has a glam look, thanks to a
faux-leather build with an allover fur print. The front zip pocket keeps
small things within reach, while an interior divider reins in potential
chaos.",
            "vendor": "ADIDAS",
            "product_type": "ACCESSORIES",
            "created_at": "2020-08-13T09:56:30-04:00",
            "handle": "adidas-classic-backpack",
            "updated_at": "2020-08-17T07:41:11-04:00",
            "published_at": "2020-08-13T09:56:30-04:00",
            "template_suffix": null,
            "published_scope": "web",
            "tags": "adidas, backpack, egnition-sample-data",
            "admin_graphql_api_id": "gid://shopify/Product/5605681594534",
            "variants": [
                {
                    "id": 35682265563302,
                    "product_id": 5605681594534,
                    "title": "OS / black",
                    "price": "70.00",
                    "sku": "AD-03-black-OS",
                    "position": 1,
                    "inventory_policy": "deny",
                    "compare_at_price": "0.00",
                    "fulfillment_service": "manual",
                    "inventory_management": "shopify",
                    "option1": "OS",
                    "option2": "black",
                    "option3": null,
                    "created_at": "2020-08-13T09:56:30-04:00",
                    "updated_at": "2020-08-13T09:57:37-04:00",
                    "taxable": true,
                    "barcode": null,
                    "grams": 0,
                    "image_id": null,
                    "weight": 0.0,
                    "weight_unit": "kg",
                    "inventory_item_id": 37588493500582,
                    "inventory_quantity": 8,
                    "old_inventory_quantity": 8,
                    "requires_shipping": true,
                    "admin_graphql_api_id": "gid://shopify/ProductVariant/
35682265563302"
                }
            ],
            "options": [
                {
                    "id": 7139663347878,
                    "product_id": 5605681594534,
                    "name": "Size",
                    "position": 1,
                    "values": [
                        "OS"
                    ]
                },
                {
                    "id": 7139663380646,
                    "product_id": 5605681594534,
                    "name": "Color",
                    "position": 2,
                    "values": [
                        "black"
                    ]
                }
            ],
            "images": [
                {
                    "id": 18699642831014,
                    "product_id": 5605681594534,
                    "position": 1,
                    "created_at": "2020-08-13T09:56:30-04:00",
                    "updated_at": "2020-08-13T09:56:30-04:00",
                    "alt": null,
                    "width": 635,
                    "height": 560,
                    "src": "https://cdn.shopify.com/s/files/1/0411/0516/2406/products/
85cc58608bf138a50036bcfe86a3a362.jpg?v=1597326990",
                    "variant_ids": [],
                    "admin_graphql_api_id": "gid://shopify/ProductImage/18699642831014"
                },
                {
                    "id": 18699642863782,
                    "product_id": 5605681594534,
                    "position": 2,
                    "created_at": "2020-08-13T09:56:30-04:00",
                    "updated_at": "2020-08-13T09:56:30-04:00",
                    "alt": null,
                    "width": 635,
                    "height": 560,
                    "src": "https://cdn.shopify.com/s/files/1/0411/0516/2406/products/
8a029d2035bfb80e473361dfc08449be.jpg?v=1597326990",
                    "variant_ids": [],
                    "admin_graphql_api_id": "gid://shopify/ProductImage/18699642863782"
                },
                {
                    "id": 18699642896550,
                    "product_id": 5605681594534,
                    "position": 3,
                    "created_at": "2020-08-13T09:56:30-04:00",
                    "updated_at": "2020-08-13T09:56:30-04:00",
                    "alt": null,
                    "width": 635,
                    "height": 560,
                    "src": "https://cdn.shopify.com/s/files/1/0411/0516/2406/products/
ad50775123e20f3d1af2bd07046b777d.jpg?v=1597326990",
                    "variant_ids": [],
                    "admin_graphql_api_id": "gid://shopify/ProductImage/18699642896550"
                }
            ],
            "image": {
                "id": 18699642831014,
                "product_id": 5605681594534,
                "position": 1,
                "created_at": "2020-08-13T09:56:30-04:00",
                "updated_at": "2020-08-13T09:56:30-04:00",
                "alt": null,
                "width": 635,
                "height": 560,
                "src": "https://cdn.shopify.com/s/files/1/0411/0516/2406/products/
85cc58608bf138a50036bcfe86a3a362.jpg?v=1597326990",
                "variant_ids": [],
                "admin_graphql_api_id": "gid://shopify/ProductImage/18699642831014"
            }
        }
    ]
}
It contains a products array at the top level, and then within each product object, there's an array for variants, images, and options. To store such type of response in a relational database, we need to model it in the form of tables (rows and columns), which is where the Integrate.io transform and function component will come to our rescue.
Related Reading: Data Transformation: Explained
Important Shopify API Resources
If you scroll through Shopify's Admin API docs, you'll find that there are lots of API resources with an overwhelming number of fields in their responses. However, by focusing on a few essential API resources and fields, we can still cover most common use cases. The information contained in these API resources and fields are:
- Orders (top-level fields in the response of Orders Resource)
- Order Refunds (nested inside the response of Orders Resource)
- Products (top-level fields in the response of Products Resource)
- Product Variants (nested inside the response of Products Resource)
- Customers (top-level fields in the response of Customers Resource)
- Customer Addresses (nested inside the response of Customers Resource)
We will put these six information pieces in independent relational tables using the pipeline that we will create in Part 2.
Related Reading: What is API Management?
About the Data Destination
I'll be extracting my Shopify data into a PostgreSQL database. However, Integrate.io is versatile in its offering and supports numerous other databases. All you have to do is connect the pipeline to the database component of your choice and add a database connection in the dashboard.
Don't Have a Data Destination Yet?
If you don't have a database, you can install PostgreSQL, MySQL, or any other supported database in your local computer and create a TCP tunnel using ngrok (which is precisely what I'm doing for this post). However, using your computer as a database is only advisable for testing purposes. For production, you can use a cloud provider like Heroku or AWS to set up one database server (check Heroku Postgres and AWS Redshift).
Why Should You Have a Data Destination?
There are a couple of advantages of keeping your Shopify data in your own database,
- Your data can stay within your control. You don't need to trust a third party to keep your data safe, and you can inspect the data anytime.
- If you want to keep the data up-to-date, you can take advantage of functionalities like incremental loading and scheduled updates provided by Integrate.io's Shopify integration. These are very helpful features, as we'll see later in the post.
Connecting to the Data Source
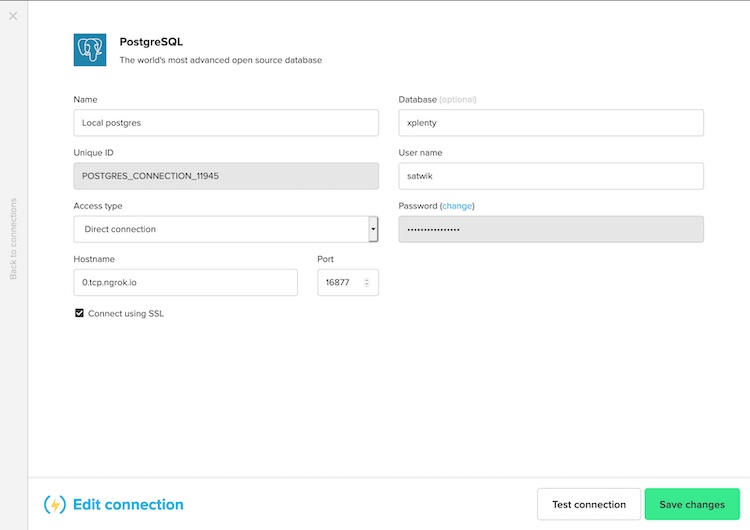
To connect your Data Source to Integrate.io, you have to create a Database connection from your Integrate.io dashboard. You have to provide typical database details like host address, username, and password. Detailed instructions are covered in the Using Components: Database Destination article. I'll add details of my local PostgreSQL database tunneled with ngrok.
We've now configured the Shopify store and the Data destination connections in this post. We also briefly discussed the structure of Shopify Admin APIs and how they work since that information will help create an ETL pipeline in the next post. In Part Two, we will create an Integrate.io package that will use these connections to fetch the data, and later visualize it with the help of Google Data Studio.
Related Reading: Top 17 Business Intelligence Tools Of 2021
How Integrate.io Can Help
If you’re looking to make your Shopify experience a bit easier as an eCommerce business owner, then Integrate.io is here to help. The Integrate.io platform has all the tools you need to make handling your business data a breeze. Simply put, when working with Integrate.io, your complex data management tasks are made easy.
Are you ready to discover the many benefits the Integrate.io platform has to offer your organization? Contact our team today to schedule a 7-day demo or pilot and to see how we can help you start reaching your goals today.
